Why a DIY Cable Crossover?
Cost is key for most of use home gym athletes. Most of us scour the Internet looking for good deals on the equipment we are accustomed to using at our old commercial gyms. let’s face it, other than squat racks, benches, and plates you have to be lucky to find anything else for a good price on the internet. Not to say this can’t be accomplished, I myself recently got an Olympic weight leg press and hack squat machine for a fraction of the cost, but it is rare to find stuff of this caliber on craigslist or similar websites. One piece of equipment that I have yet to see for a reasonable price is a cable crossover machine. So, I decided I was going to go out on a limb and make a DIY cable crossover. After looking on YouTube to see if any others have made a DIY cable crossover I noticed that if they had cable crossovers, they were simple and non-adjustable. The ones that I am describing in this article are adjustable which is extremely useful.
Related Post: Searching Craigslist Like A Pro
I decided that I would build a DIY cable crossover as an addition onto my squat rack. This serves two purposes, one was to save space, and the other was so I could use the adjustable hooks that hold the barbell as the attachment that would allow the cable to move up and down to different locations. All the Items that I used for this build were purchased at Lowes for under 150$.
Materials Needed
The first this you will need is a metal L-bar which it what you will bolt to the squat rack. Next you will need two I-bolts, the kind that have threads on one end and a circle on the other. These will be where one set of pulleys attach, you will need 4 pulleys all together. Located in the same area as the pulleys, you will need to get 4 carabiners (6 if you need carabiners for the fly attachment themselves). With the pulleys and carabiners make sure you get ones rated for enough weight. They will also carry coated braided cable, which you should get at least 20 feet of, where the chains are located. While you are there get two pieces of chain about two foot or so in length. The chain does not have to be too big, just big enough for a bolt to slide through the links. Also in this area, you will need the attachment to put a loop in the ends of the cables, get four and make sure they are the right size for your cable. Next go to pluming, there you will see metal piping and attachments. Here you will need two ~6-inch-long pipe and two floor phalanges. Get 1 ½ inch pipes if you have Olympic plates. Other things you may have at home or need to pick up are 3/8 bolts (4) nuts (6) washers (6) and drill bit that can go through metal (be careful some that say metal are only rated for aluminum).
The Build

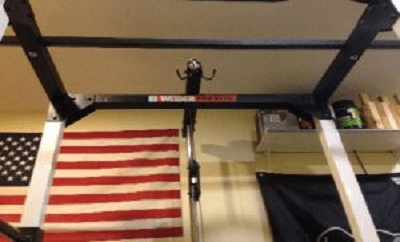
First start by attaching the L-bar to the squat rack or apparatus you wish to use. This is done by measuring out the distance between the two mid-points in the section that the L-bar will be attached to. Mark the two points on the center of the L bar and drill out the holes.

Then mark the holes you drilled by placing the L-bar on the squat rack and tracing the holes with a marker. I would suggest drilling the top hole out without the L-bar on, and then to make sure everything lines up drill the bottom hole out with the L-bar clamped down. Go ahead on bolt the bar down with two of the bolts washers and nuts. Next drill out the holes for the I bolts, and attach them with washers and nuts. These I bolts will be used to hold one set of pulleys by a carabiner. These holes need to be directly above where you want the weights to be pulled off the floor from. If you have a vice it makes drilling the holes in the metal pipe a little easier.

Drill a hole all the way through the pipe about an inch from the edge, so that one of the bolts can go through. This is going to be how the pipe attaches to the cable. Once you have done this to both pipes go ahead and attach the floor phalanges to the pipe.at this point you are going to want to measure out how much cable you want to cut. Measure from the hole you made in the pipe, with enough to make the loop, to the setting about half way down. When you use this at the higher settings you may have to step away from the rack but it’s the way this is set up. Go ahead and cut the cable and put the loop on the side that attaches to the pipe.

BEFORE attaching the other loop to the other side, run the cable through ALL PULLEYS, two per side. At this point one pulley should be attached to the I bolts on the L-bar and one should be free floating on the cable. Attach a carabiner to the free-floating pulley. This is going to be where the cable system attaches to the moveable holder of the squat rack. It doesn’t matter what you use to loop the cable system to this area if you can get it on and off easily and not break under the weight you will be using. Then go ahead and make the other loop on the opposite side where the cable attachment such as fly grips or cable EZ curl attachment will clip on to. You will notice that if you try to but the cables all the way down to the floor, the weight holder comes off the ground. This is what the chain you bought was for. Go ahead and measure and cut the chain with bolt cutters to the right length.
Wrapping Up
Congratulations! At this point you should have a working DIY cable crossover that is adjustable and sturdy. This system, if you got the materials to support the weight, will be able to hold any amount of weight you would want to use. Your friends will be jealous and talk about how awesome it is that you have this in your gym. Hopefully this piece of equipment will be useful for you on your fitness journey and always #garagegymlife.