3 Quick DIY Additions for every Garage Gym Owner
Here are three quick DIY additions every Garage Gym Owner can build in a weekend. It will make your garage gym workouts more effective, offer much needed assistance work, and create variety to your training.
- Single Leg Squat Stand
- Valslides
- “T” Handle for Kettle Bell Swings
Single Leg Squat Stand
Why you need it
- Improves Knee Stability and Hip Mobility
- Reduces stress on the spine for older lifters who have developed low back pain from years of Back Squat
- Erase lower body muscle imbalances
- Increases Glute Activation vs. other single leg lower body exercises
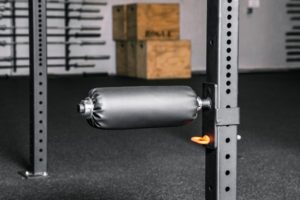
- You have an older rack that does not offer the Single Leg Attachment (see top left)
- The exercise feels awkward because of a lack proper equipment
Quick Snapshot
- Build It – For about $20 in materials, you can duplicate the Perform Better stand to your specific height! As with all of these diy addititions, cost is a huge factor!
- Buy It – The Perform Better Single Leg Squat Stand is $179 + Shipping. The Single Leg Squat Attachment for your rack will range from $95 – $125 + Shipping if that option is even available to you.
MATERIALS, TOOLS & BUDGET
- 8 foot, 2-in x 4-in lumber = $6
- Screws = hopefully left over at this point J
- If not, Kreg 2-1/2 in. Coarse Zinc-Plated Steel Square-Head Pocket Screw (1, 50-Pack)
- Deck Mate #8 x 2 in. Star Flat-Head Wood Deck Screws (1, 1 lb.-Pack)
- ¾” x 24” Steel Pipe = $10
- ¾” Black Iron Cap = $4
- Hampton International Bar Pad – Extra Thick = $32
- Power Drill
- Chop Saw or Hand Saw
- The Kreg Jig
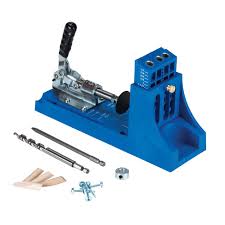
kreg jig - I have the K4 Pocket-Hole System
- Includes Jig, drill and driver bit, 2″ face clamp, and screw kit
- The clamps alone are worth it for me since I work alone 99% of the time
- The Kreg jig system is the SECRET to building the strongest, flat lumber joints
Make your cuts
Total footprint is 19” x 24”. The Stand height is 14”. 14” height is perfect for me at 5’10”. Please adjust the Stand’s height to fit you.
- Base: (2) 19” and (1) 17”
- Uprights: (2) 13 ½”
- Diagonal Supports: (4) 10 ½” on the long diagonal
Assembly
Build the base
- Pre Drill 4 holes on the horizontal cross member using the Kreg Jig
- Drill 2 ½” Kreg Screws to build the “I” base
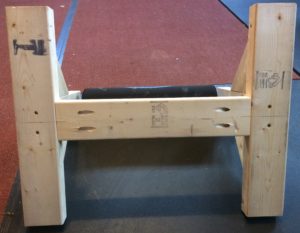
Build the uprights
- Drill ¾” holes for the steel pipe using a spade bit into the uprights
- The center of the spade bit is 1 ½” from the top of the uprights to create a total stand height of 14”
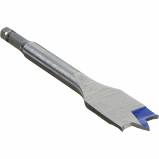
spade bit
- The center of the spade bit is 1 ½” from the top of the uprights to create a total stand height of 14”
- Install the 3/4” x 24” steel pipe into the newly drilled holes in the uprights
- Hand tighten the Steel Pipe end caps onto the pipes
- Center the uprights on the base
- Use 2 ½” deck screws to attach uprights through the bottom of the base
Build the diagonal supports
- Line your diagonal supports up flush with the uprights
- Use (8) 2 ½” deck screws to attach diagonal supports to the uprights and base on each side
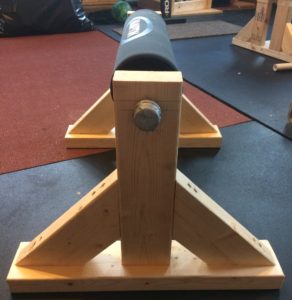
Padding options
I bought an extra think Hampton Bar pad because I also use it for heavy barbell Glute Bridge and Hip Thrust. For this Squat Stand, you could easily duct tape an old yoga mat for a permanent solution.
Valslides
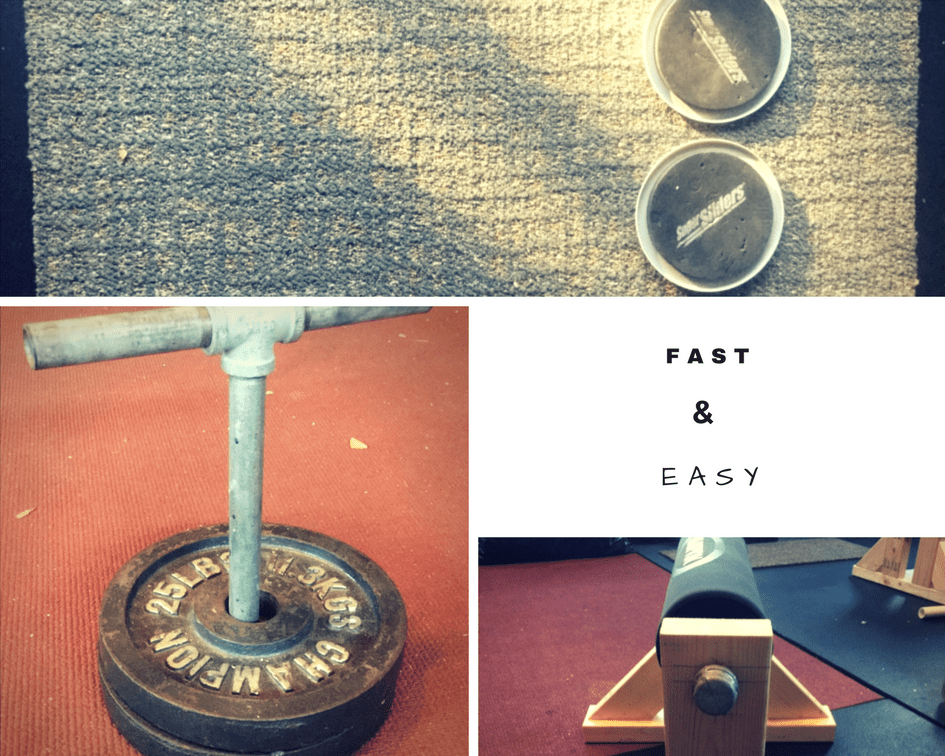
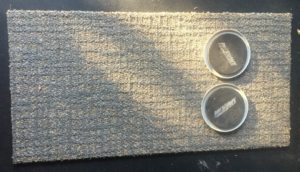 May be the simplest project yet! A pair of furniture sliders and carpet is all you need for a full body workout.
Why you need it
- Allows athletes the ability to perform sliding exercises without the bulky and expensive sideboard
- Adds multiple variations to Lunges, Planks, and Push ups
- Super convenient tool that can add intensity to every person’s program
Quick Snapshot
- Build It – A pair of furniture sliders collecting dust in your cabinets and a piece of carpet remnant (many homeowners already have these available) will bring about a new training stimulus
- Buy It – A pair of Valslides will cost you $30. It comes with a carry bag and instructional DVD
MATERIALS, TOOLS & BUDGET
(2) Furniture Sliders 9-1/2” x 5-3/4” Large Oval SuperSliders
(1) Piece of carpet remnant
Assembly
- NONE! Throw the sliders on the carpet and get to work
You could get a pair of SKLZ SLIDEZ from Rogue Fitness for $30 + Shipping. You gain the benefit of portability with these Sliders because they will slide on any surface. Your DIY sliders will work best on carpet.
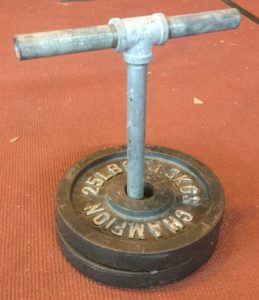
“T” Handle for Kettle Bell Swings
 Why you need it
- Swings are a staple hinge movement core stability and strength
- Safely strengthens the lower back for those with a history of back pain
- Activates all the muscles in the lower body
- Heart pumping, calories burning activity that compliments any Fat Loss programs
- Younger athletes can also deadlift with the “T” Handle
Quick Snapshot
Build It – Unless you are a kettlebell only athlete with access to a wide range of weights, I put this DIY project in the “no brainer” category. Most kettlebells will be about $1 to $1.50 per pound. You can build a loadable “T” Handle for $21!
Buy It – A 25lbs Rogue Fitness KB = $41. A 53 lbs Rogue Fitness KB = $63
MATERIALS, TOOLS & BUDGET
(2) 3/4 in. x 5 in. Black Steel Nipple = $6
(1) 3/4 in. Black Iron Threaded Tee = $3
(1) 3/4 in. x 12 in. Black Steel Nipple = $7
(1) 3/4 in. Black Iron Floor Flange = $5
Assembly
This could not be simpler.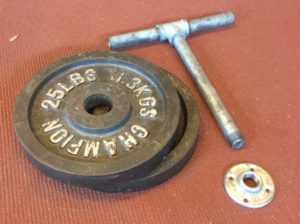
- Hand tighten the 5 in. Black Steel Nipples into the Black Iron Threaded Tee
- Hand tighten the 12 in. Black Steel Nipple into the Black Iron Threaded Tee
Optional: use athletic tape or tennis racquet grip tape on the Steel handles
Want More?
Look for more DIY projects and all things Garage Gym from my next Book – Garage Gym Bible: The Expert Guide to Creating The Ideal Home Gym. Due out March 27, 2018. We will be doing free giveaways for the best garage gym submitted to the Get Fit Now Facebook page. Also, we will be doing free giveaways for the Garage Gym Magazine community.

